Java Springboot 웹프로젝트의 Google Cloud Run 서비스 3/4 (Springboot 프로젝트 개발)
Springboot + Google Cloud Project
1. Google Cloud Project 배포
- 간단한 Springboot 애플리케이션을 만들고,
- 컨테이너 이미지에 패키징하고,
- 컨테이너 이미지를 Artifact Registry에 업로드하고,
- Cloud Run에 배포한다.
2. Springboot 애플리케이션 생성방법
- 이클립스에서 Spring Starter Project를 이용하여 Spring Boot 프로젝트 생성
- Curl 명령어를 이용해 샘플 애플리케이션을 다운로드
3. Java 애플리케이션의 Cloud Run 배포 과정
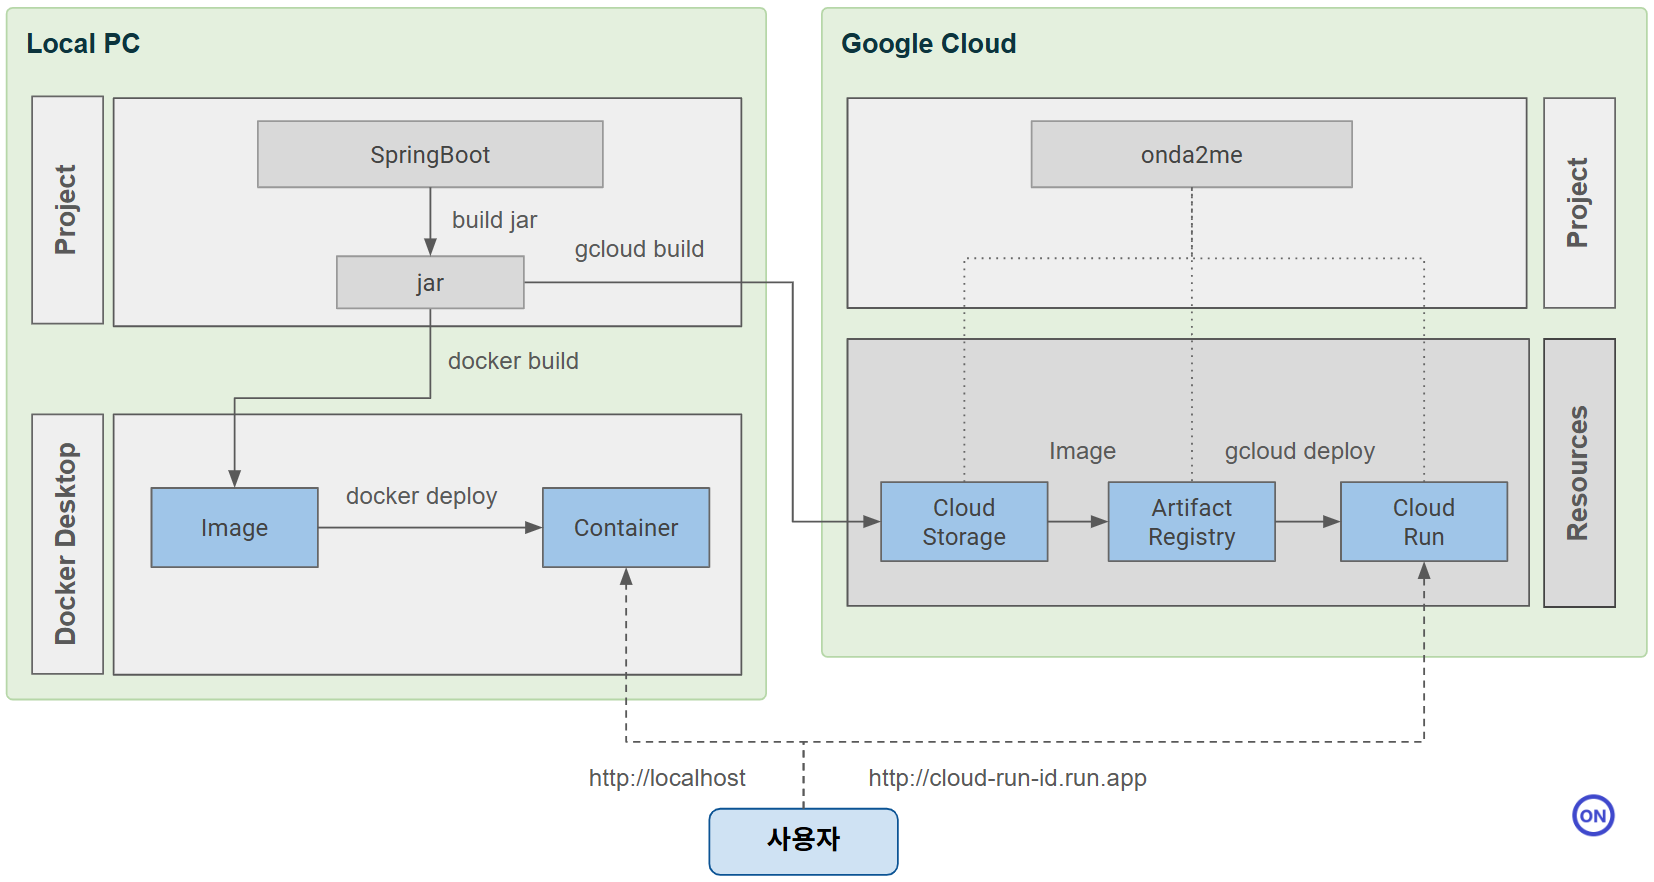
4. onda2me java 개발환경
- Eclipse 2021-06 (4.20.0) + Spring Tools 4
- Java 11
- MySQL
- Maven
이클립스로 Springboot 프로젝트 개발하기
1. 이클립스로 프로젝트 생성
-
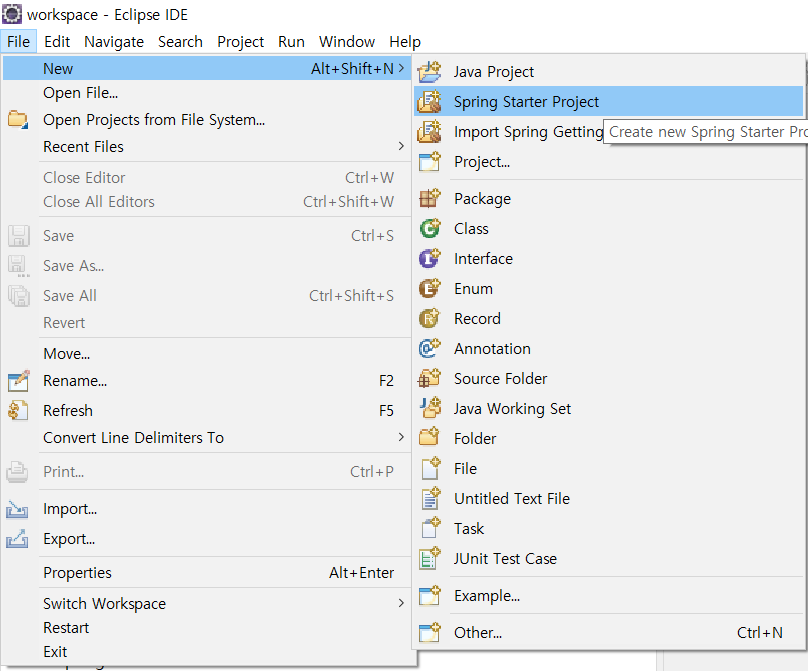
File> New Project> Spring Boot> Spring Starter Project
-
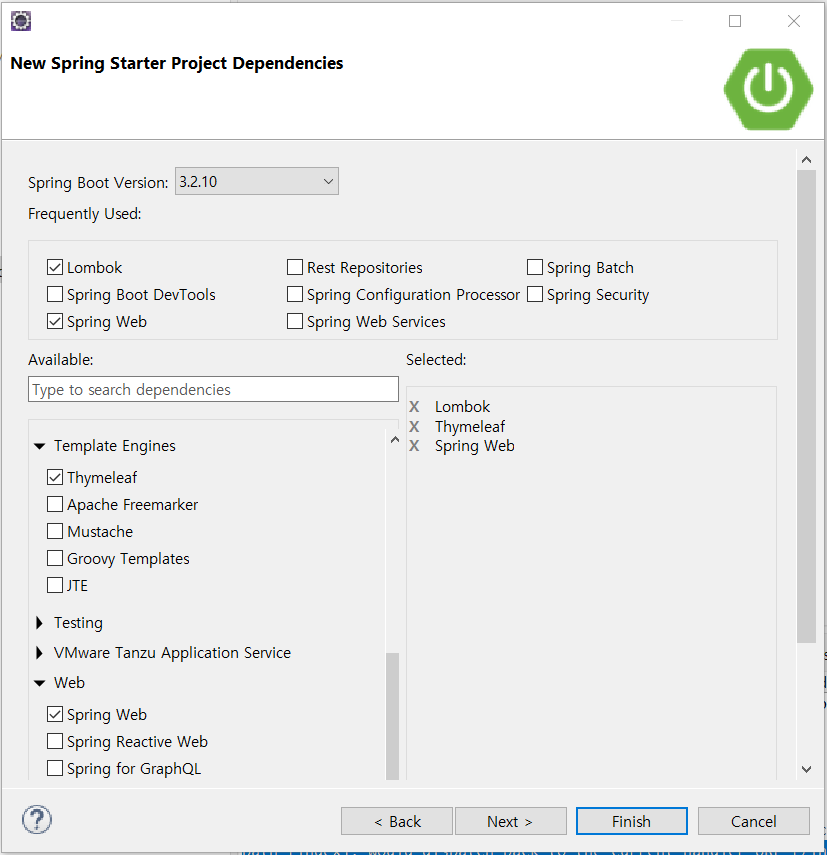
프로젝트 설정
-
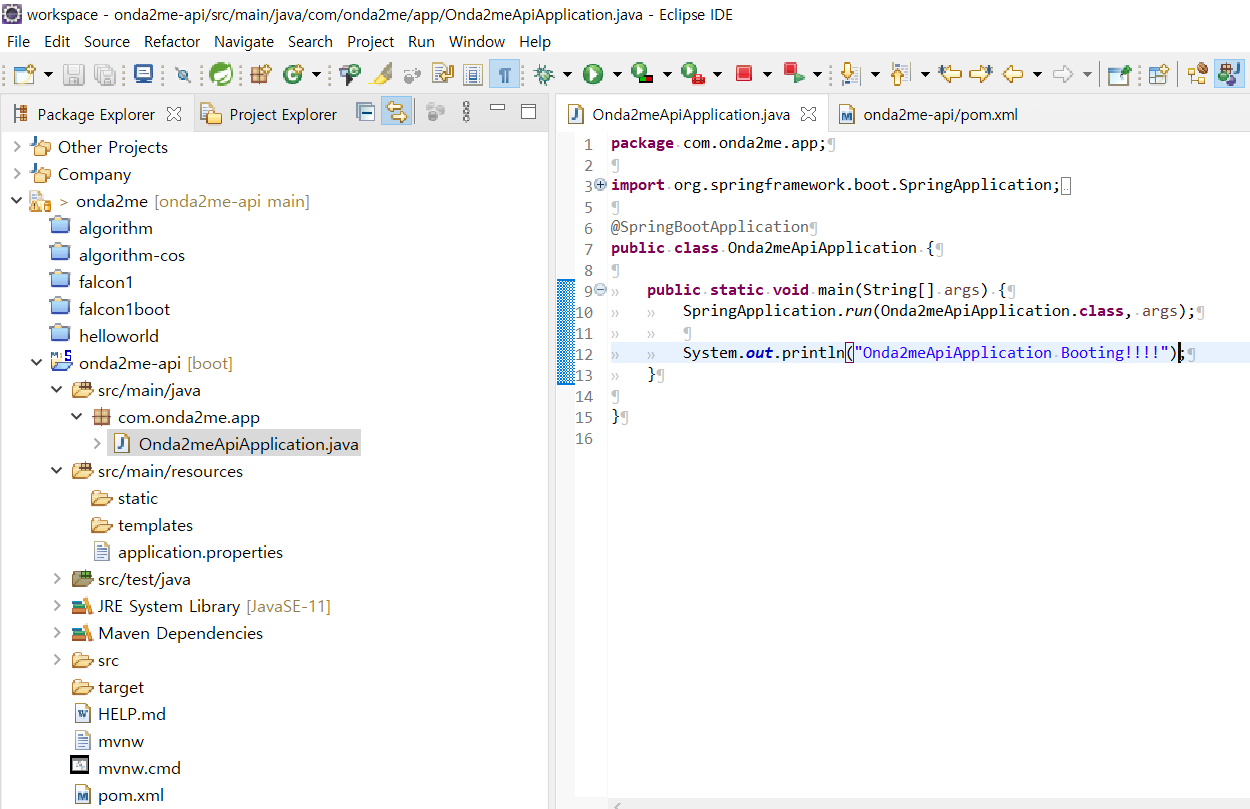
프로젝트 생성
-
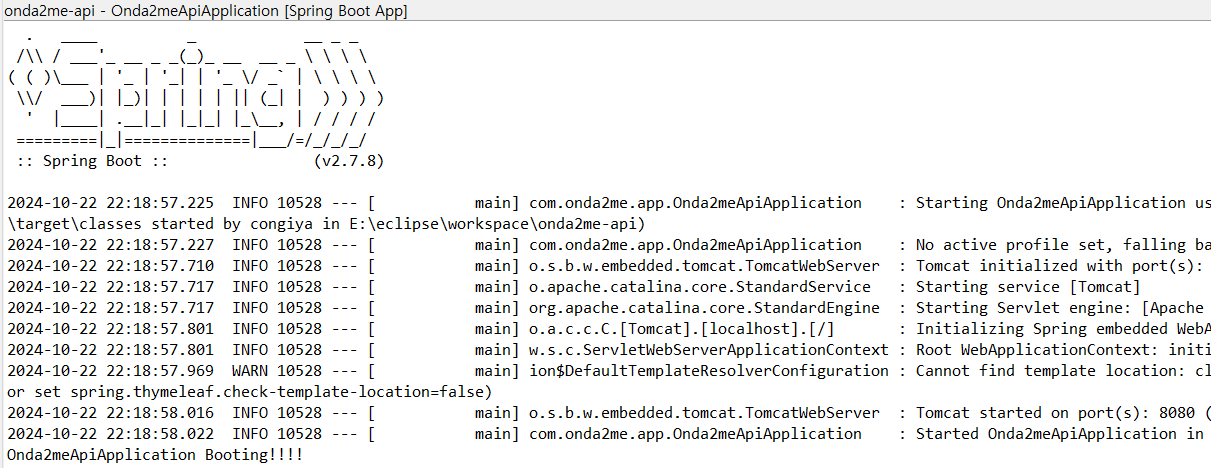
프로젝트 실행
2. 테스트 파일 작성
-
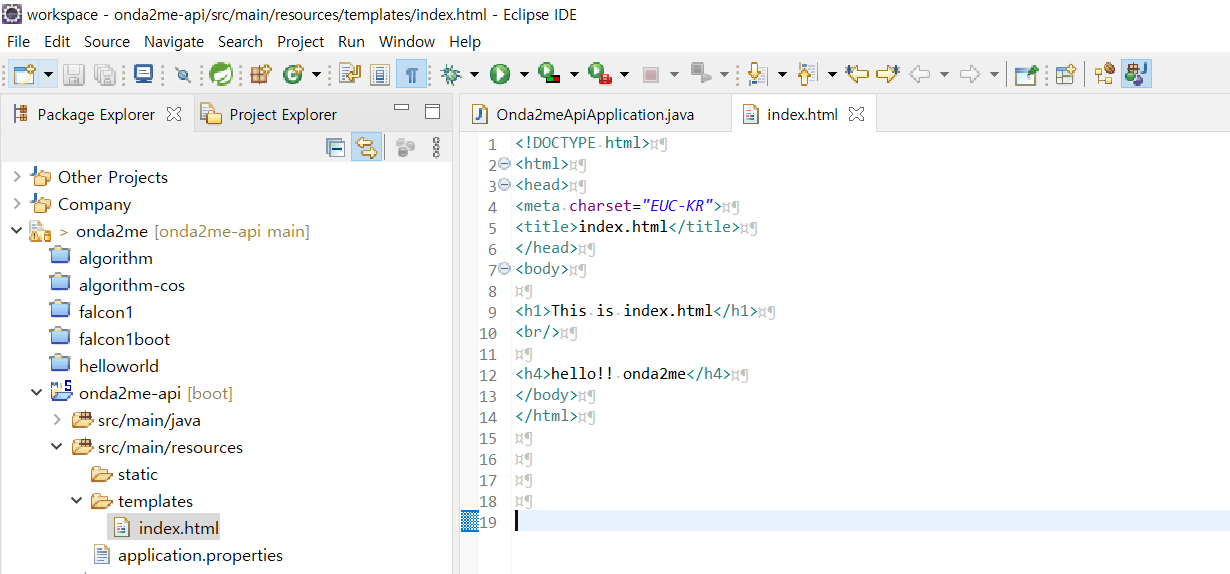
/static/index.html 또는 /templates/index.html 파일 작성
-
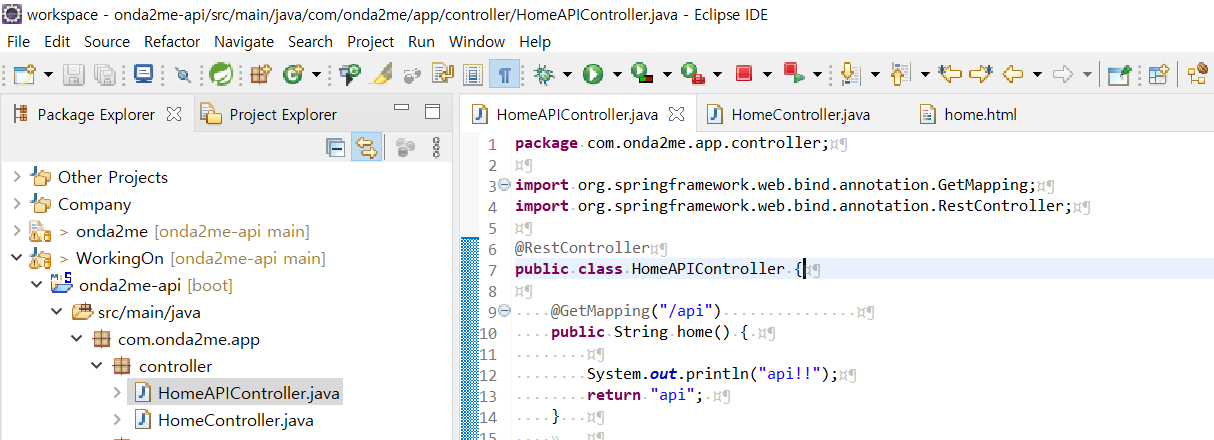
RestController.java 파일 작성
@RestController
public class HomeAPIController {

    @GetMapping("/api")
    public String api() {

        System.out.println("api!!");
        return "api";
    }
}
3. 접속 확인
-
http://localhost:8080/

-
http://localhost:8080/api

샘플 Springboot 프로젝트 다운로드하기
0. 환경설정
- Java SE8 이상
- WSL 설치(CURL 명령어 사용) WSL 다운로드 바로가기
1. curl 명령어로 웹프로젝트 생성
- 프로젝트를 생성할 폴더위치에서 아래 명령어 입력
  # 방법1. 상세설정
  curl https://start.spring.io/starter.zip
      -d type=maven-project
      -d bootVersion=2.7.8
      -d dependencies=web
      -d javaVersion=11
      -d name=helloworld
      -d artifactId=helloworld
      -d baseDir=helloworld
      -o helloworld.zip
  unzip helloworld.zip
  cd helloworld

  # 방법2. 필수설정만 입력
  curl https://start.spring.io/starter.zip -d dependencies=web -d name=helloworld -d artifactId=helloworld -o helloworld.zip
2. 테스트 파일 작성
- RestController.java 파일 작성
@RestController
public class HomeAPIController {

    @GetMapping("/api")
    public String api() {

        System.out.println("api!!");
        return "api";
    }
}
+ 참고
- Google Cloud-Java Spring Boot 서비스 배포 바로가기



댓글남기기